The goal: carry a layered story into relief
A child in a homemade box car imagines a Formula 1 future. Darth Rogue’s Dream It Live It brings the child, race car, track, flags and lettering into one circular composition. It received First Prize in SculptOK’s AutoWorld to Print Contest.
The supplied depth map makes the intended height relationships easier to inspect than the color artwork: the child and box car stand forward, the race car sits behind them, and the lettering follows the rim. This gives a practical example of what to check when a design mixes text, foreground subjects and fine background detail.
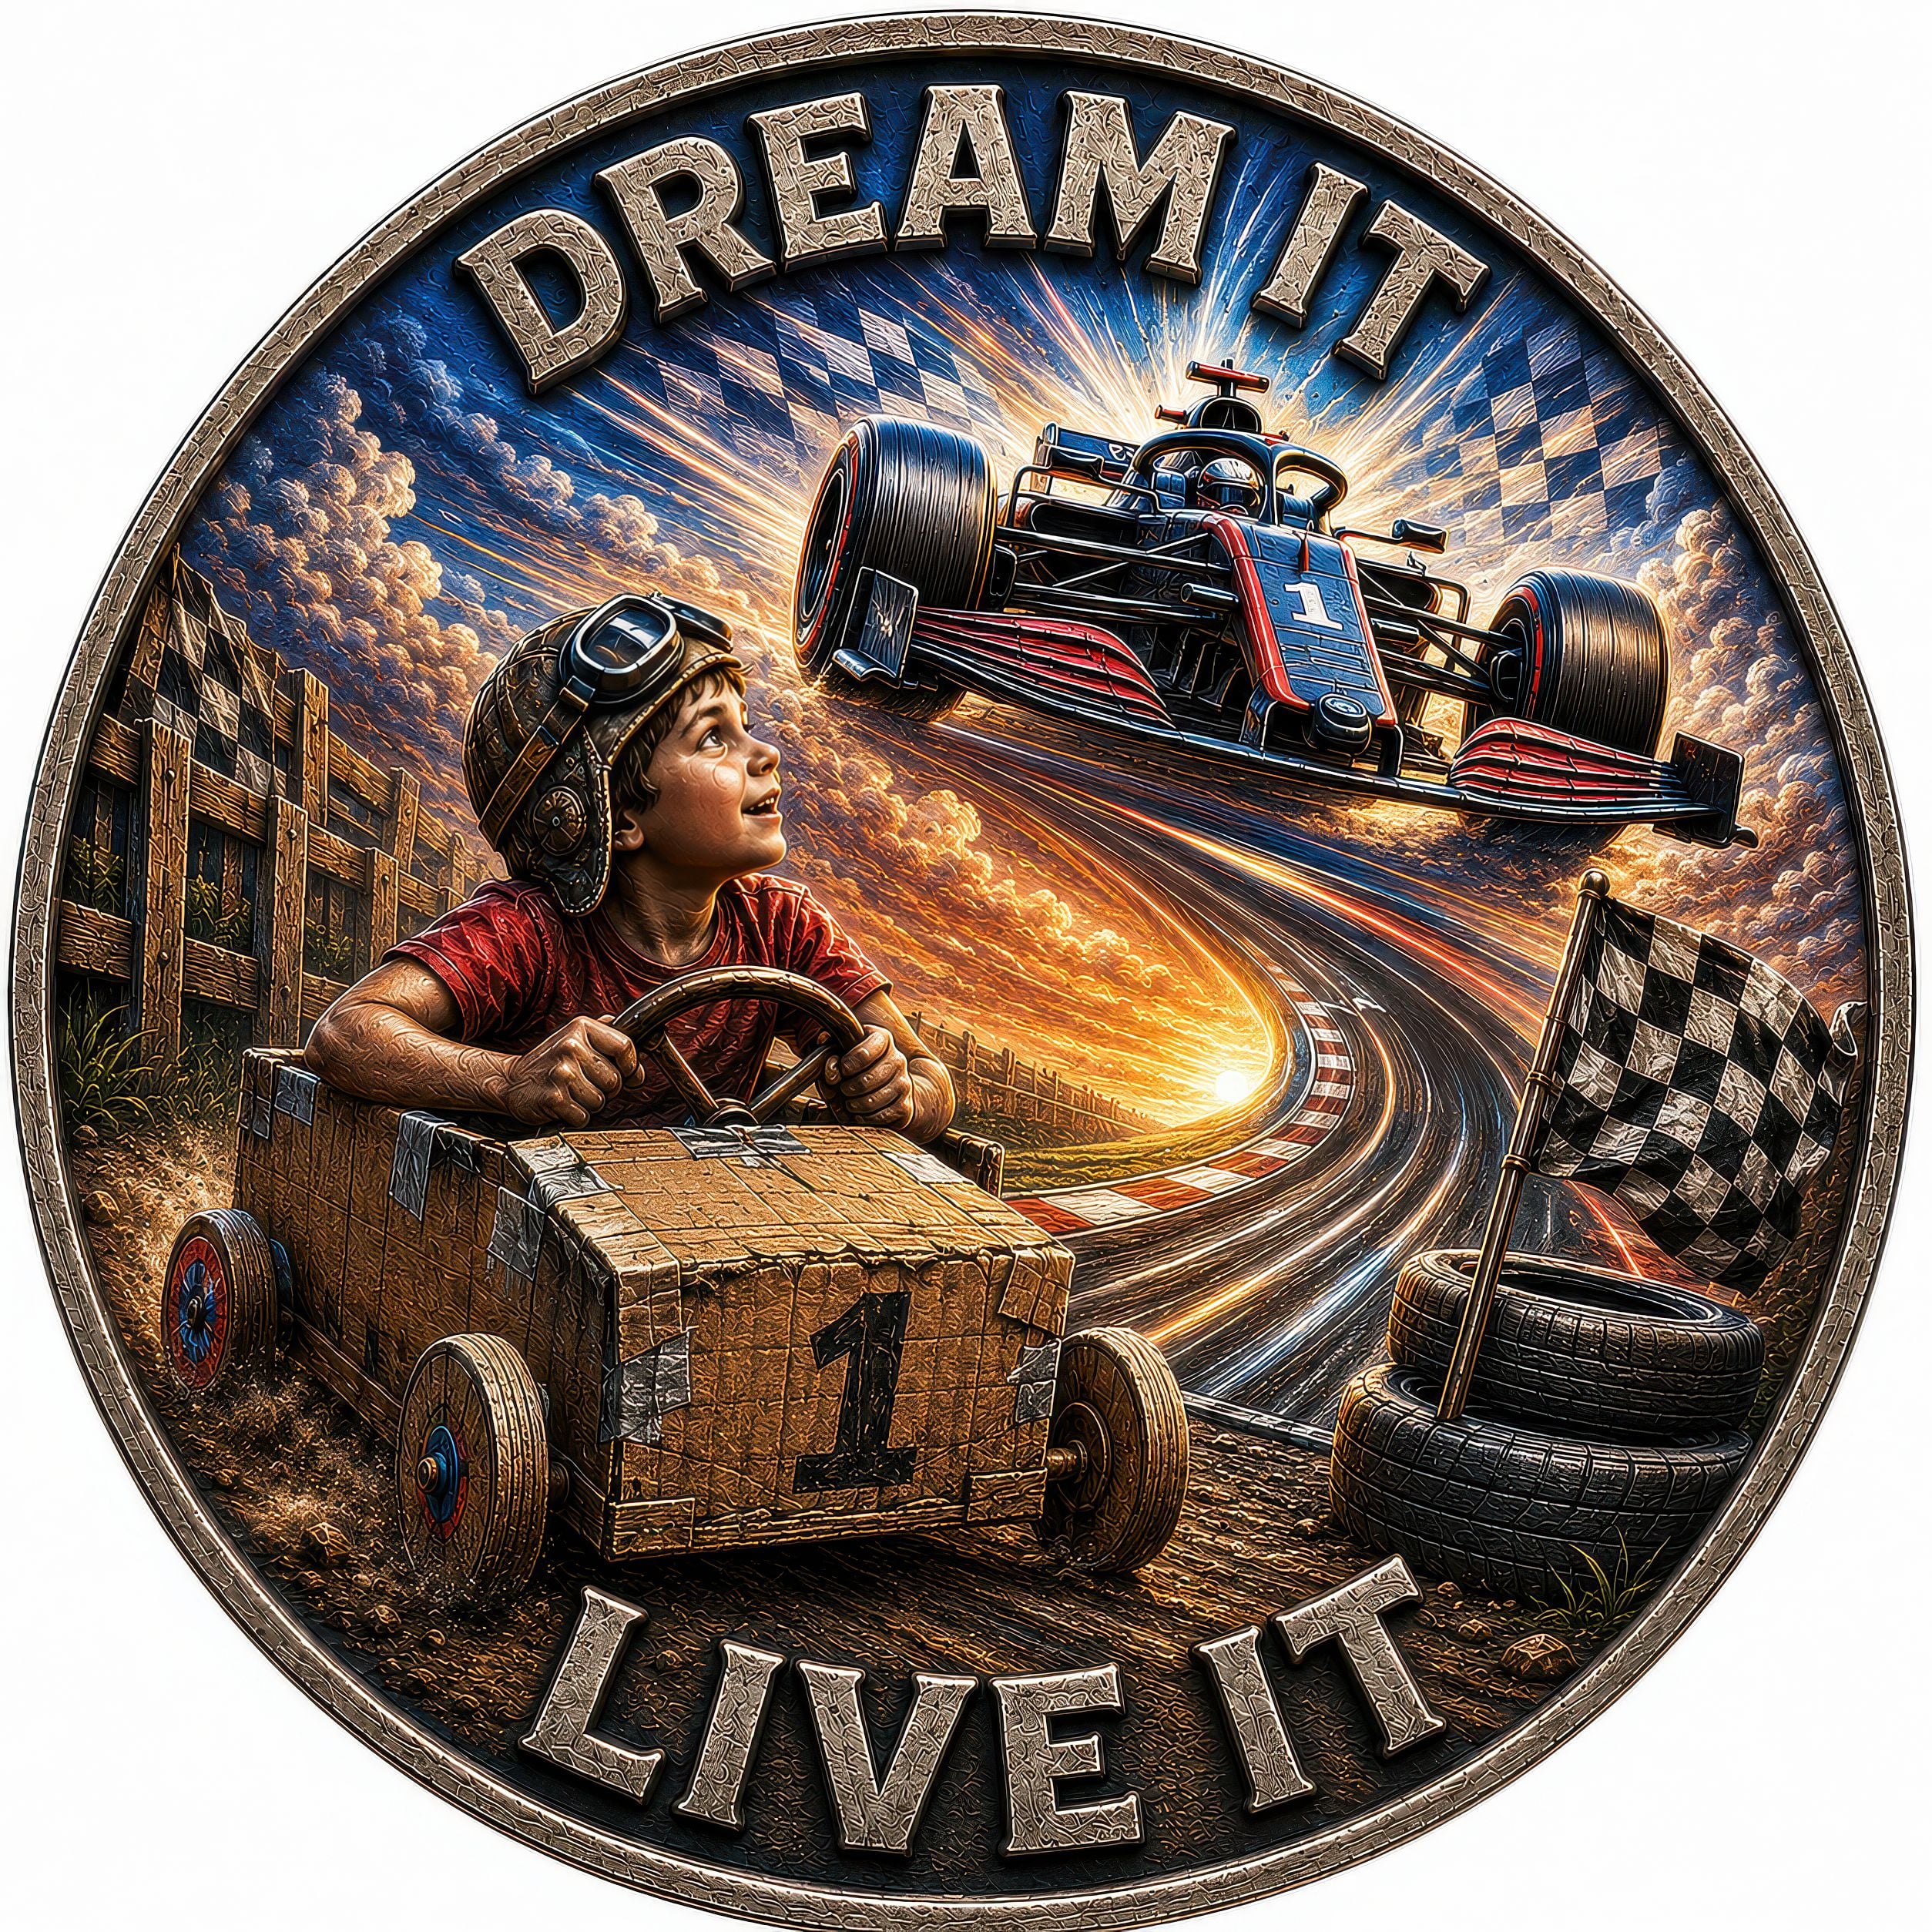
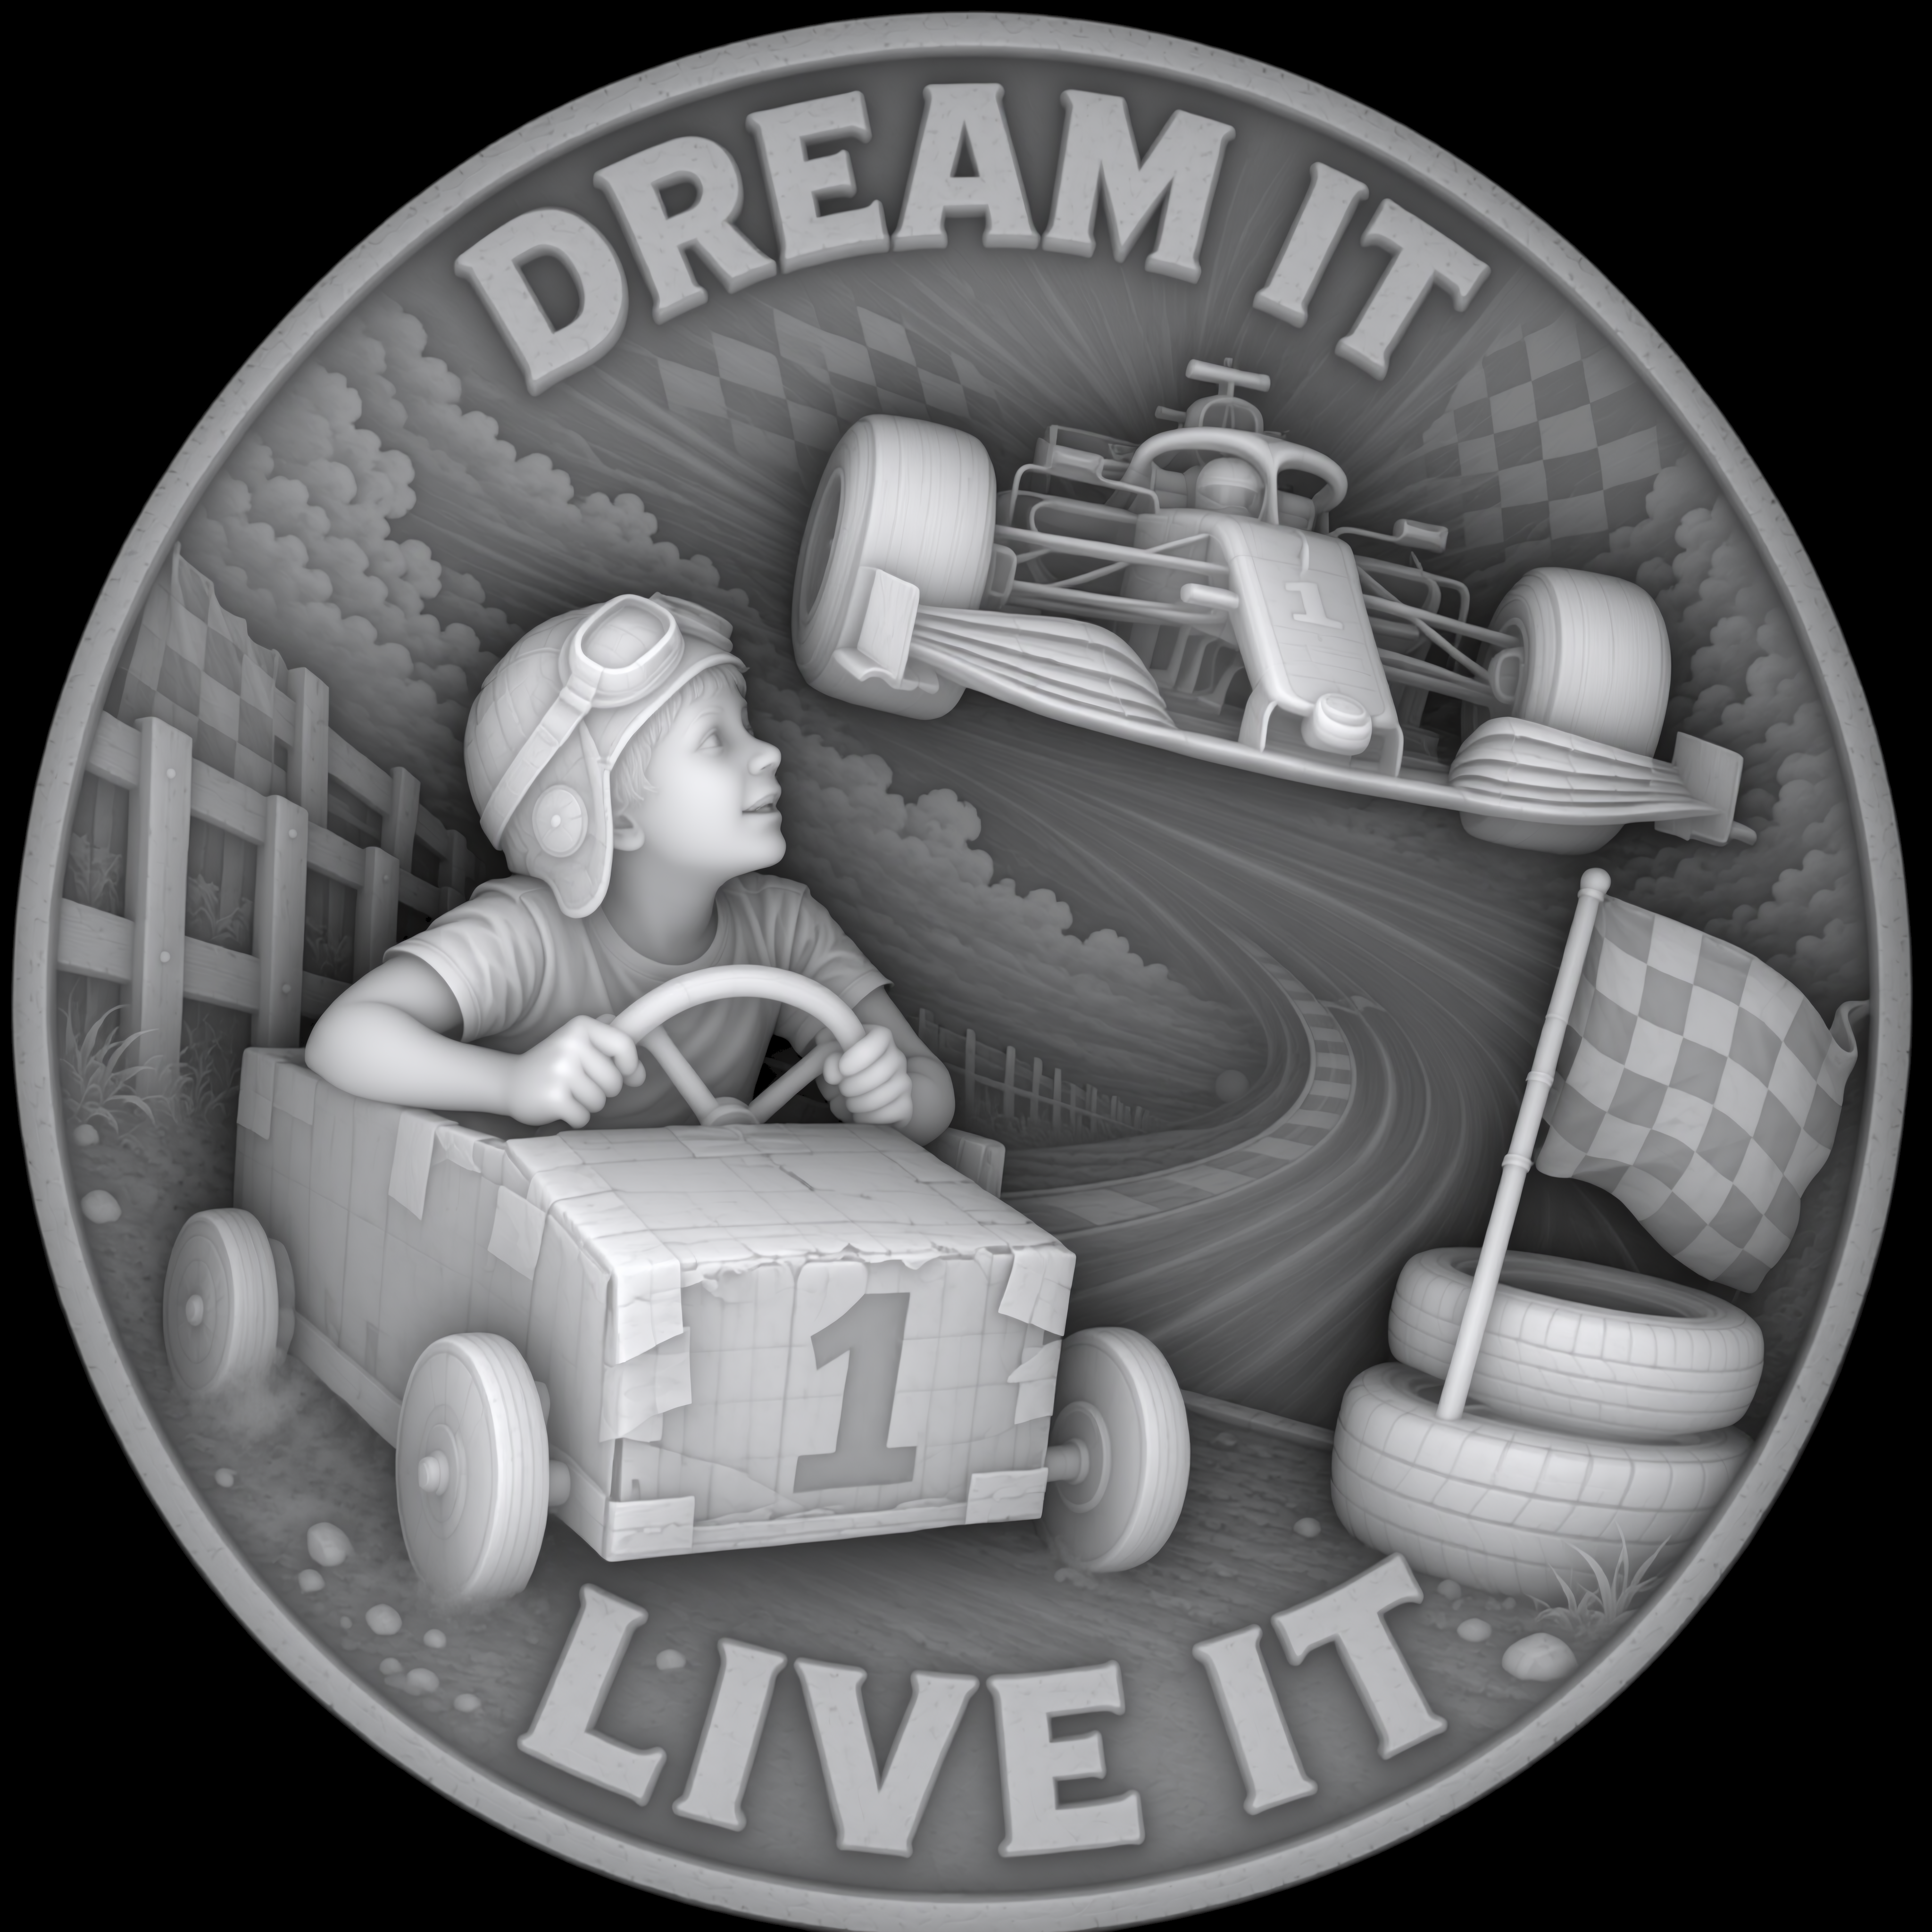
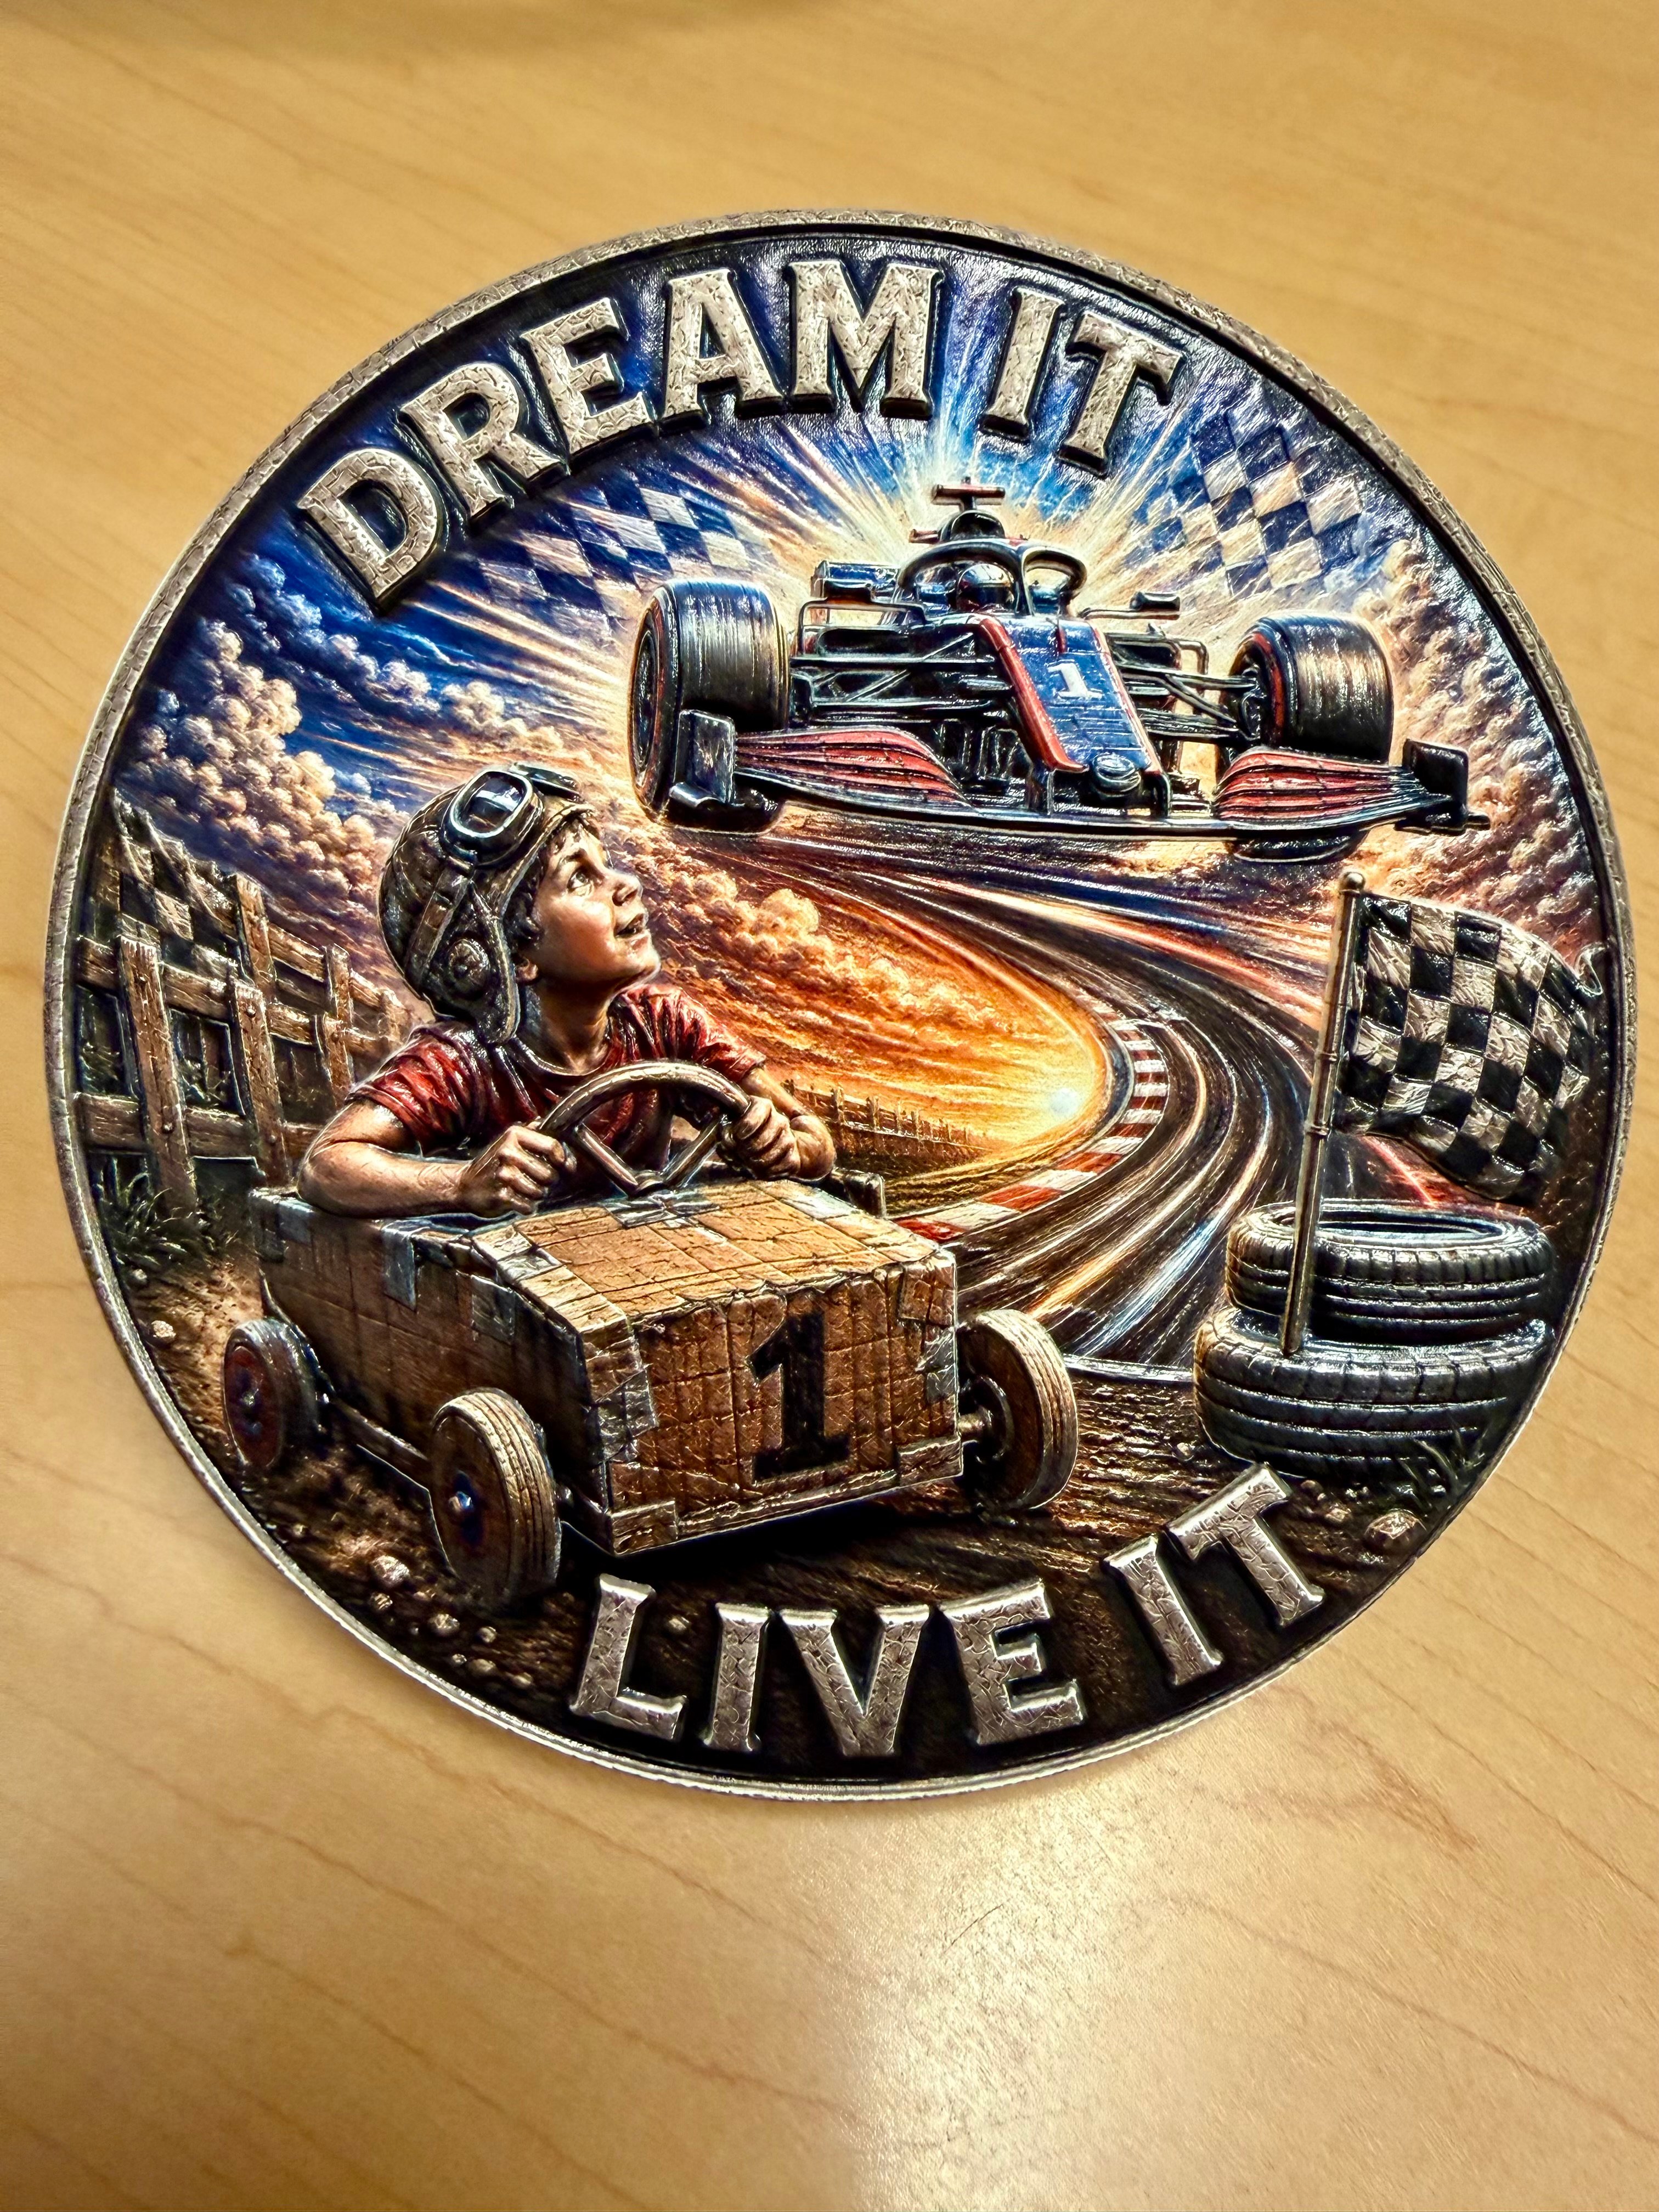
What the creator documented
Darth Rogue describes repeatedly refining the composition to express a child’s dream, then importing the artwork into SculptOK to generate a 4K depth map. The description emphasizes transitions between foreground and background.
The available public description ends before a complete production account. It does not name the generation model, editing settings, export format or manufacturing equipment. The images and the documented depth-generation step are the basis for this case.
| Stage | Evidence in the submission |
|---|---|
| Source design | High-resolution color artwork with the full racing composition. |
| Depth generation | The creator names SculptOK and 4K generation; the uploaded depth PNG is 4096 × 4096. |
| Completed presentation | Two submitted photographs present the finished artwork; one is reproduced above. Material and process are not specified. |
SculptOK demonstration: inspect actual relief geometry
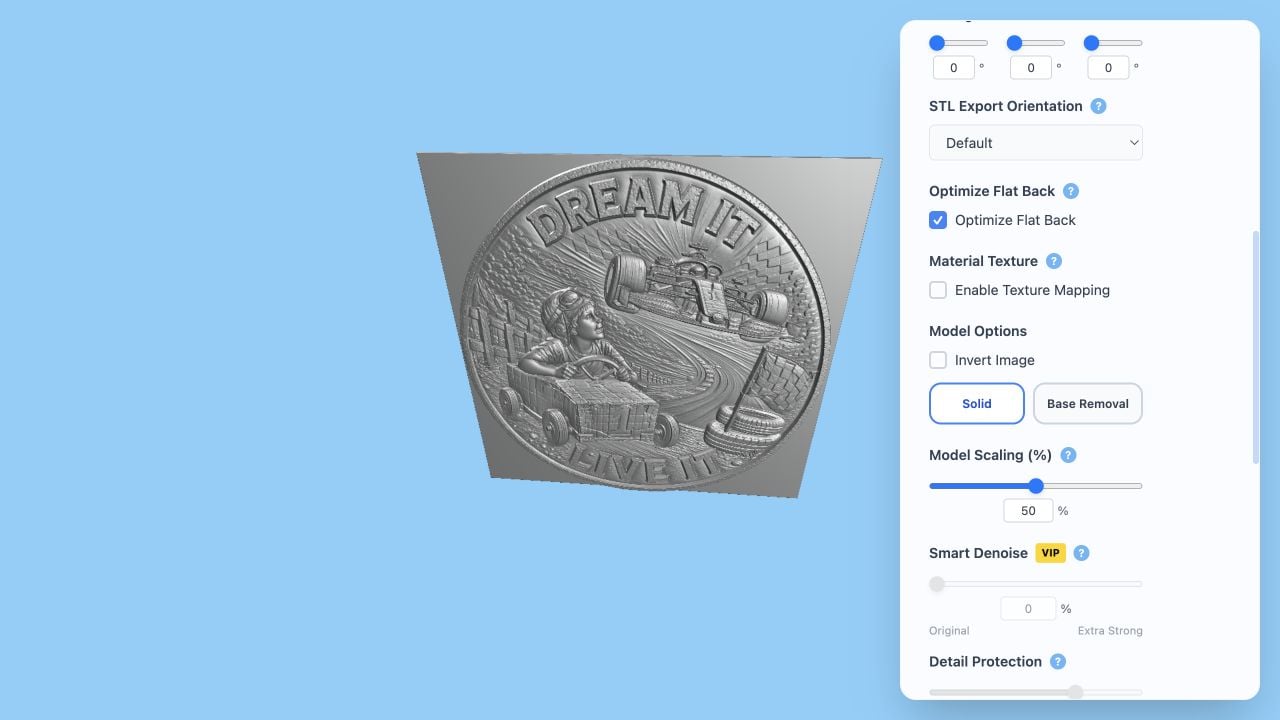
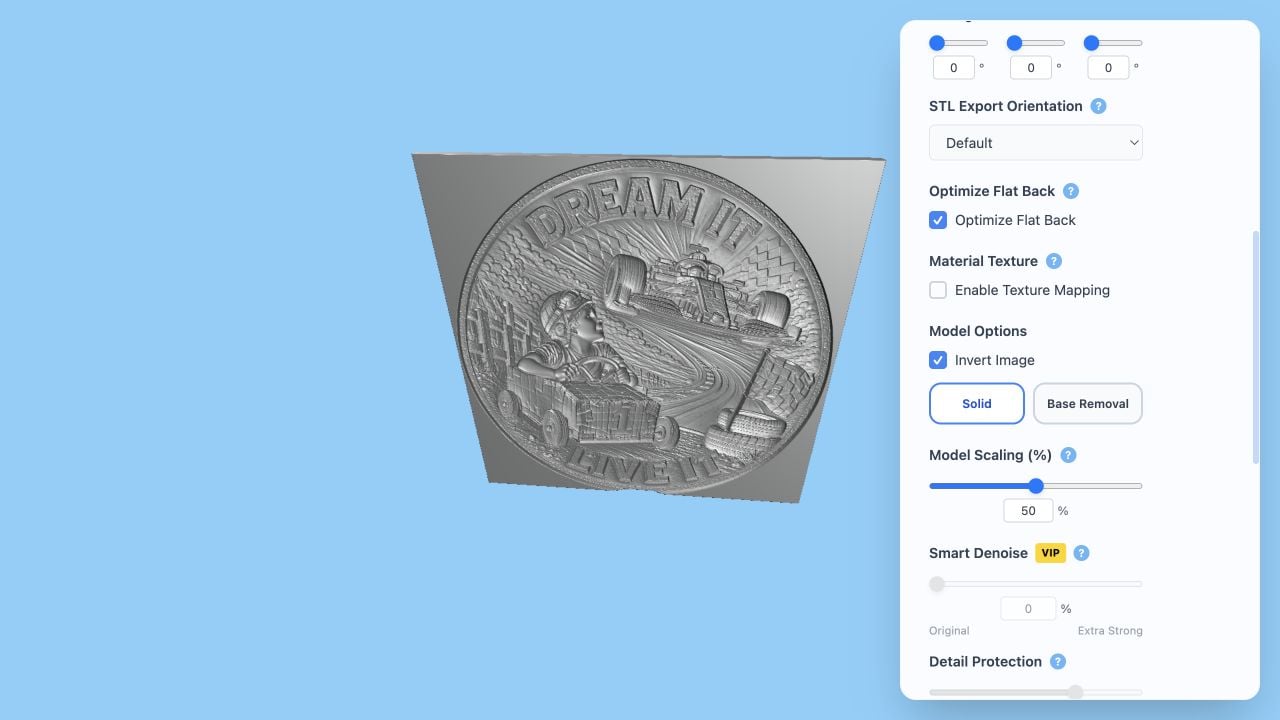
We loaded the public 4K depth PNG into the current 3D Lithophane Generator and inspected it in 3D before selecting it for this guide. The lettering, wheels, foreground figure and flags remain recognizable in the generated surface.
For this demonstration, Width is 160 mm, Min Thickness 1.6 mm, Max Thickness 5 mm and Contrast 1.5. Model Scaling is 50%. In this actual preview, the interface reports 1024 × 1024 and 2,105,332 triangles; the uploaded source file is 4096 × 4096. Shape is Square, mode is Solid and Optimize Flat Back is on.
The two views change Invert Image while keeping the listed settings consistent. Compare the rim, lettering and subject heights, and notice the square backing produced by this setup. These SculptOK demonstrations were recorded on October 5, 2026 using the free preview controls; generation, VIP denoising and mesh export were not part of the demonstration.
Prepare your own artwork for relief
Choose a source where the important subjects and letters are readable. Generate a depth map, then inspect the large forms before judging fine texture: foreground subjects, background, lettering and the outer border should have intentional height relationships.
Review the surface from more than one angle. If separate areas merge, compare Black point, White point and Midtone before increasing Contrast. Apply local corrections where needed, and keep the original depth map for comparison.
Choose your output for the next application. Use a supported depth image for an image-based workflow, or export a mesh when CAM or a slicer requires one. Check dimensions, backing and thin features there before planning a machine job.
Common questions
What should I inspect first in a complex depth map?
Start with the separation of foreground and background, the main silhouette and the letter faces. Rotate the 3D surface to check whether these heights express the intended composition before focusing on fine texture.
How do I check the resolution used in the preview?
Read the image dimensions and triangle count in Model Information. In this demonstration, the public source is 4096 × 4096, while the preview reports 1024 × 1024 with Model Scaling set to 50%. These are separately observed values; inspect the tool’s reported geometry rather than using source pixel dimensions as the mesh resolution.
Which settings matter before exporting a relief?
Review physical width, minimum and maximum thickness, height direction, shape and backing. Then verify the exported mesh in the application that will prepare the CNC or printing job. A shaded preview does not determine material-specific settings.